今天给大家带来的是基于苹果官方提供的UI测试框架实现的非越狱机器远程控制实现原理。
▌XCUITest
XCUITest是Aplle自Xcode7开始引入的自动化测试框架,而且在Xcode8中,原先的UIAutomation框架废弃无法再用。
相比较UIAutomation,XCUITest使用简便程度有了很大提高。
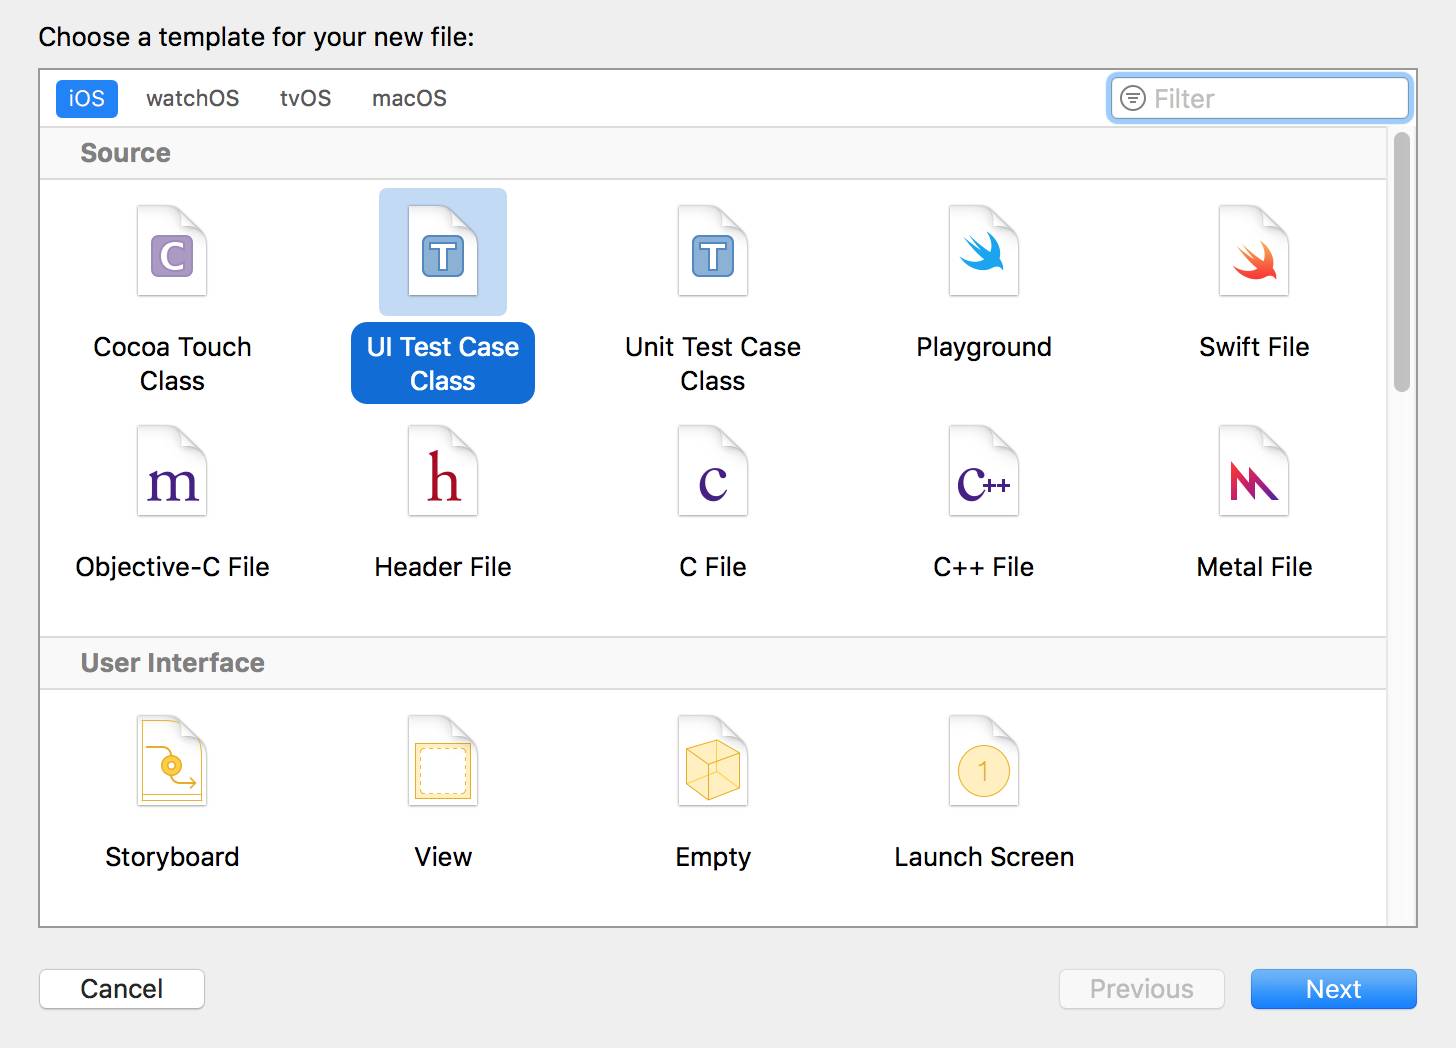
选择UITestCase,会生成一个Case文件如下:
#import
@interface testUI : XCTestCase
@end
@implementation testUI
- (void)setUp {
[super setUp];
// Put setup code here. This method is called before the invocation of each test method in the class.
// In UI tests it is usually best to stop immediately when a failure occurs.
self.continueAfterFailure = NO;
// UI tests must launch the application that they test. Doing this in setup will make sure it happens for each test method.
[[[XCUIApplication alloc] init] launch];
// In UI tests it’s important to set the initial state - such as interface orientation - required for your tests before they run. The setUp method is a good place to do this.
}
- (void)tearDown {
// Put teardown code here. This method is called after the invocation of each test method in the class.
[super tearDown];
}
- (void)testExample {
// Use recording to get started writing UI tests.
// Use XCTAssert and related functions to verify your tests produce the correct results.
}
@end
根据提示在testExample部分修改添加代码。
此时可以使用xcode自带的录制功能,点击鼠标使得光标处于testExample的方法下,再点击红色的录制按钮。
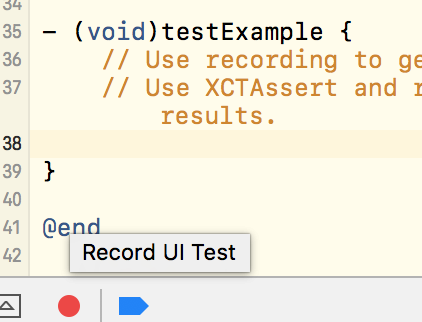
项目会自动编译部署到指定的设备上(真机或模拟器均可),并自动启动。此时操作app的同时,Xcode会记录操作并自动转化成代码。
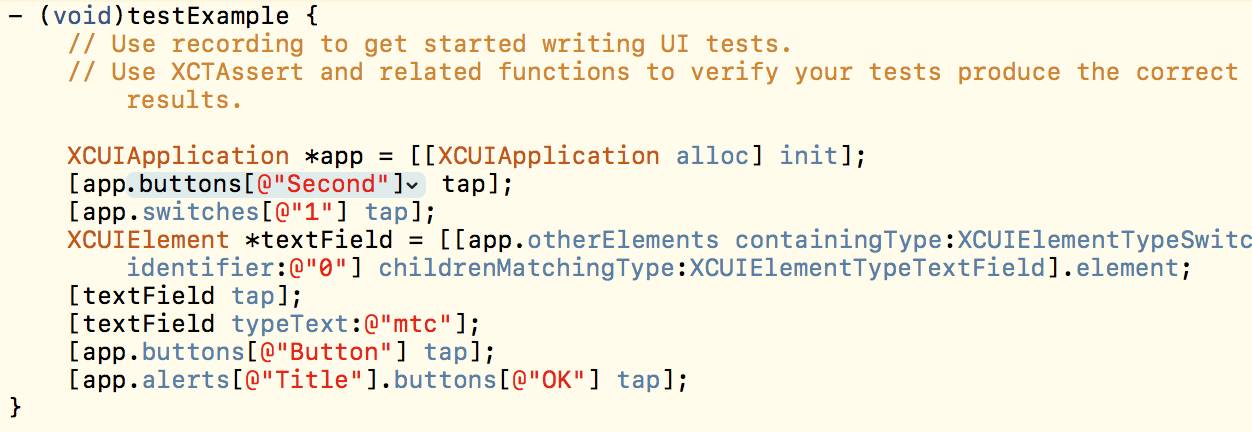
也可以手动根据自己需求调整或新增操作代码。
完毕后点击测试即可直接执行自动化测试。

▌设备控制
第一次执行测试会在设备端桌面生成一个类似xcuitesdemoUITests的APP,该APP无法执行执行,只能通过xcode的test启动。
启动时会有个瞬间的黑屏,然后app进入后台,同时启动待测APP,而后依次开始各项测试任务。
这里启动的哪个APP是由UITest项目的配置决定的,也就是说如果工程拥有多个APP,可以选择启动不同的APP。
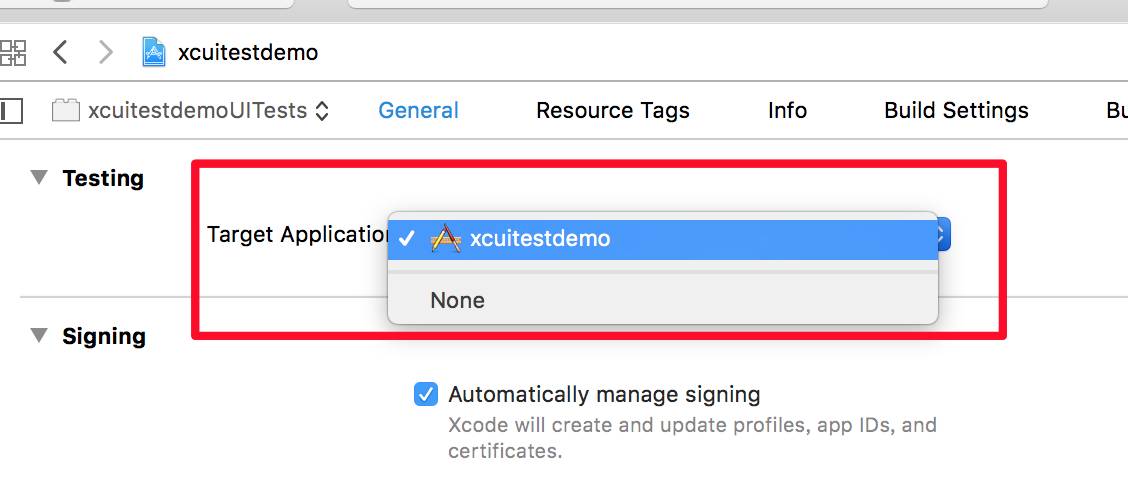
当然也可以选择None,但启动测试的时候会出现以下的问题。
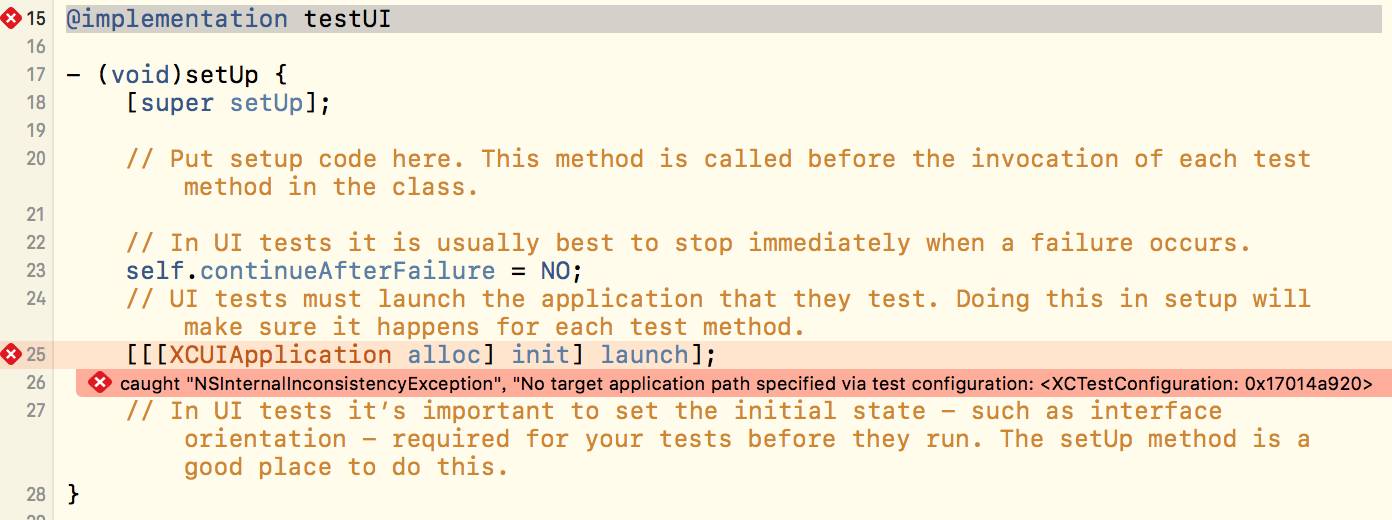
默认的XCUIApplication头文件中,只有如下2个方法:
@interface XCUIApplication : XCUIElement
/*!
* Launches the application. This call is synchronous and when it returns the application is launched
* and ready to handle user events. Any failure in the launch sequence is reported as a test failure
* and halts the test at this point. If the application is already running, this call will first
* terminate the existing instance to ensure clean state of the launched instance.
*/
- (void)launch;
/*!
* Terminates any running instance of the application. If the application has an existing debug session
* via Xcode, the termination is implemented as a halt via that debug connection. Otherwise, a SIGKILL
* is sent to the process.
*/
- (void)terminate;
但是可以从私有API的Header里能挖掘出比较多的方法。
+ (instancetype)appWithPID:(pid_t)processID;
- (void)dismissKeyboard;
- (BOOL)setFauxCollectionViewCellsEnabled:(BOOL)arg1 error:(id *)arg2;
- (void)_waitForViewControllerViewDidDisappearWithTimeout:(double)arg1;
- (void)_waitForQuiescence;
- (void)terminate;
- (void)_launchUsingXcode:(BOOL)arg1;
- (void)launch;
- (id)application;
- (id)deion;
- (id)lastSnapshot;
- (id)query;
- (void)clearQuery;
- (void)resolveHandleUIInterruption:(BOOL)arg1;
- (id)initPrivateWithPath:(id)arg1 bundleID:(id)arg2;
- (id)init;
通过InitPrivateWithPath方法可以以下述方法启动任意其他已安装的APP,并对其他APP进行操作。
比如下述代码可以启动safari,并打开http://mtc.baidu.com/
NSString *appBundleID = @"com.apple.mobilesafari";
XCUIApplication* app = [[XCUIApplication alloc] initPrivateWithPath:nil bundleID:appBundleID];
[app launch];
[app.otherElements[@"URL"] tap];
[app typeText:@"mtc.baidu.comn"];
▌WebDriverAgent
WebDriverAgent(https://github.com/facebook/WebDriverAgent)是Facebook基于XCUITest推出的iOS的移动测试框架,支持目前市面上所有iOS9以上的设备。
该框架通过在设备端启动一个HTTP Server提供一系列API接受操作指令来代替固定的操作代码,除了启动应用、点击和滑动页面元素,WebDriverAgent还提供截图、页面元素查询等功能,iOS的appium测试框架就是基WebDriverAgent实现的。

▌远程控制iOS设备
基于上述技术,我们把功能具体化成一个Web服务。
通过轮询的方式获取当前屏幕内容,并将屏幕上的鼠标点击以及滑动操作转化成具体的操作指令,最终即可达到通过Web页面控制手机设备的效果。

点击阅读全文